

If you've got a hoodie with a print you no longer find to your liking, you may be wondering how to give it a new lease of life without it. You've come to the right place to find the solution! In this article, we'll explore three methods for removing any kind of print from your hoodie, whether vinyl, heat transfer or even embroidery. Each of these methods has its own benefits and precautions to take, ensuring that your garment remains in good condition throughout the process. The ideal article if you're looking to refresh an old hoodie or simply make room for a new design.
First Method: Use Acetone
The first method we're going to explore involves the use of acetone, a powerful organic solvent known for its ability to effectively remove a wide range of prints from various fabrics. While this technique can yield quick results, it's crucial to proceed with care to minimize the risk of damaging your hoodie's material. The potency of acetone makes it highly effective, but also necessitates careful handling and adequate safety measures.
1. Choose a well-ventilated area to start as acetone can give off unpleasant fumes.
2. Make sure the hoodie is clean and dry before you start. If it is dirty or wet, the print may stick to the fabric more.
3. Protect the surface on which you are going to perform the operation with paper or a cloth under the hoodie.
4. Start to gently soak a cloth with acetone, you must avoid spilling it on the fabric and only touch the print.
5. Gently rub the acetone-soaked cotton or cloth over the print. Apply light pressure, but do not rub too hard to avoid damaging the fabric.
6. If the print is very stubborn, you can add a little more acetone to the cotton or cloth while continuing to be careful with the fabric.
7. Once the print has been removed, machine wash the hoodie in cold water to remove all traces of acetone. Do not use hot water if you want a perfect result.
Since acetone can be harmful to some fabrics, we recommend starting this method on a small area first.
Second Method: Parchment Paper and Iron
The second method we'll delve into is especially worth noting for those concerned about potential fabric damage. This method is gentler than the first two and is suitable for vinyl prints. Using parchment paper and an iron, this technique is less harsh on your hoodie's fabric and is ideal for prints that have been applied through heat, such as vinyl or transfer prints. In the following sections, we'll walk you through the steps to execute this technique.
1. Preheat the iron to a medium temperature. Do not set it to the hottest temperature, as this may damage the fabric.
2. Place the hoodie on a flat surface and protect it with parchment paper. Make sure the print you want to remove is covered with parchment paper.
3. Place the iron on the parchment paper and apply light pressure for about 10 seconds. Do not leave the iron on the fabric for too long, as this may burn the fabric.
4. Remove the iron and carefully remove the parchment paper. If the print has not been completely removed, replace the parchment paper over the print and repeat until the print is completely removed.
5. Once the print has been removed, machine wash the hoodie in cold water to remove any parchment paper or print residue.
Note again that this method is mostly used on prints that have been heat applied such as vinyl and transfer prints. Do not use this method on screen prints that have been applied cold. As with the first method, we recommend that you start on one part of the hoodie first.
Third Method: Remove an Embroidery
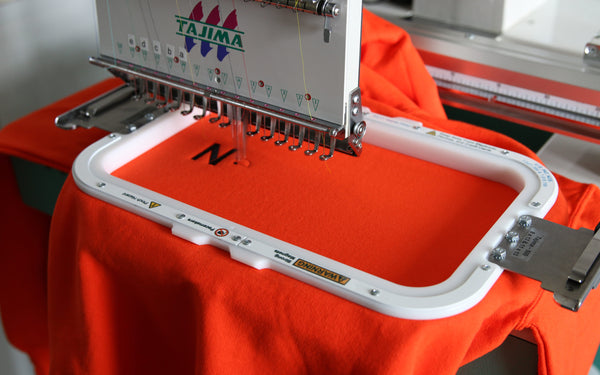
The third method we're going to discuss is a bonus for those looking to remove embroidery from their hoodie or any other garment. Embroidery removal is a different challenge compared to print removal, as it involves thread and often adhesive substances. Because of the intricacy and sturdiness of embroidery, extra care and specialized tools may be necessary for successful removal without damaging the underlying fabric. Whether you're dealing with a simple logo or more complex designs, this method will guide you.
1. Remove visible embroidery by hand by cutting the threads of the embroidery with a pair of thin scissors. If the embroidery is dense, you can use tweezers to grab the threads and remove them one by one.
2. If the embroidery thread is thick, you can use a thread trimmer to remove the embroidery more easily. Slide the blade of the thread trimmer under the embroidery threads and pry the stitches loose.
3. Once you have removed the visible embroidery, you can remove the remaining traces. You can do this with an iron and a damp cloth. Place the damp cloth over the area where the embroidery was and run the iron through the cloth for about 30 seconds.
4. Then remove the cloth and use a spatula or plastic scraper to gently scrape off the glue residue. Be careful not to damage the fabric.
5. If you are unable to completely remove the glue residue, you can gently use acetone or isopropyl alcohol to clean the area.
6. Once you have removed the embroidery and glue residue, machine wash the hoodie in cold water to remove all residue.
It is important to note that removing the embroidery can damage the fabric. If you are not sure if you can remove the embroidery yourself, it is recommended that you hire a professional to do so. You can also discover other of our articles like how to wash your hoodie safely.
Conclusion
Removing a print from a hoodie may initially seem like a daunting task, but with the right methods and products, it's entirely possible to do it safely and effectively. We hope you find the three methods we've shared in this article useful in your efforts to give a second life to your favorite garments. Whether you choose to use acetone, greaseproof paper and an iron, or even set out to remove embroidery, always remember to take the necessary precautions to protect the fabric and carry out preliminary tests.